Using Canvas
This brief tutorial was originally based on Canvas 5.0. The verision that is currently on the geology computer lab machines, Canvas X, is similar for the what we will be doing, but has new features too.
Basic principles.
-
Set up the size/number of pages before you begin.
-
Use the "layers" capacity for complicated drawings.
-
Two "types" of work are possible
-
line-work (vector instructions)
-
bitmaps (scans, photos, "paintings," etc)
-
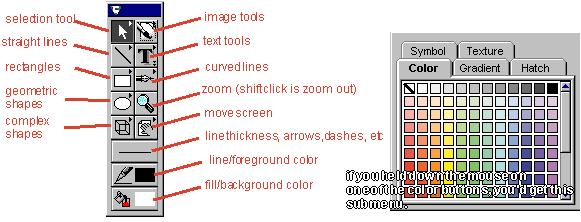
Most things you can do appear on the Toolbox Palette
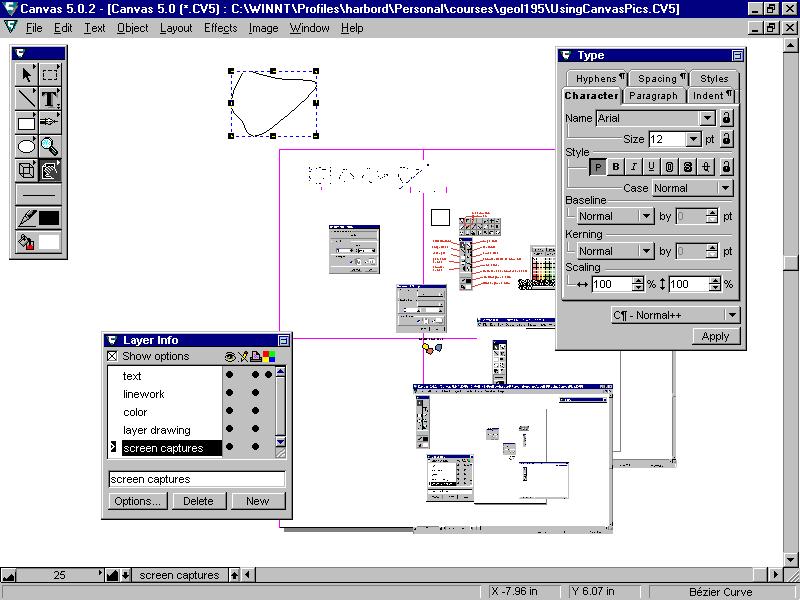
Here's the basic window
We will cover the basics in class including:
-
the menus
-
the palettes
-
the layers
-
zooming
-
drawing size..

Setting up the Page Size, etc
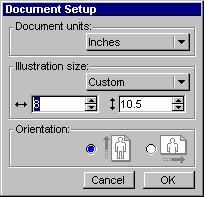
Press the F10 key or choose Layout/Document Setup from
the Menu

If you just want one page, choose US Letter in the Illustration Size.
If you want the illustration to be printed on more than one piece of
paper, or you want to reduce it down later, choose a larger size or use
custom and set either the number of inches or printer pages, depending
on how you set the "document units".
Using Layers
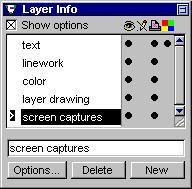
from the menu choose Layout/Layers/Layer Info...
which brings up this Palette

You can.....
add layers
delete them
make them visible or invisible
printable or not
locked (can't write on them).
This is especially useful when you have a scan on which you are basing
a drawing or map. (If you want you can "Auto Trace" the linework
from a bitmap into a line drawing.)
Using the Toolbox
The default palette looks like this.

Most of what you'll do is center on this tool box. You can "tear
off" the submenus to make a palette out of them too.
When you select a line or object, it highlights it with a box.
Double click and you can edit it
by moving a vertex
if it's a smoothed curve (Bezier), move the "handles"

Line Drawing versus Bit Maps

In class we will cover
-
text formatting
-
line sizes
-
bezier curves
-
line editing
-
grouping
-
moving front to back/layer to layer
-
image cropping
-
saving across all layers
-
auto tracing (if time)
Harbor, 99, Connors, 01, 07


