Geol 185
Downloading data from the Garmin GPS to Arcview
and
Rectifying ("georeferencing")
an image to a coordinate system.
This process is made possible using
-
a shareware program called Waypoint+
-
a user-reated Arcview extension called AVGarmin
I found these searching for "garmin" at the ESRI website, which
pointed to the Calfiornia
Dept of Game and Fish, who developed the AVGarmin software. It
can be download directly from the ESRI site ("a user script") or form the
developers website.
Steps in the process include
-
gathering "waypoints" using the GPS
-
dumping them from the GPS to a PC as a "comma delimited text file"
-
making an ArcView project and with a projected view
-
importing the data file into Arcview using the AVGarmin extension
Your Assignment is
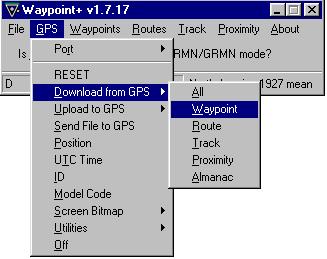
1. Get the waypoint data into the GPS.
2. Getting the data OUT of the GPS.
make sure that the GPS is in "garmin" mode. Press menu twice to get
the setup menu, toggle to the right to the last page, and make sure that
"garmin" appears in the top box.
connect the cable to the PC (use COM1 port or change in in the GPS menu
shown below)
turn on the GPS (when it barks about having to initialize a position, just
say "no")
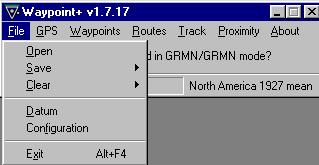
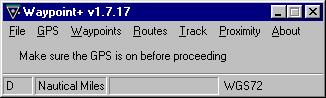
start the Waypoint program (an alias is on the desktop).
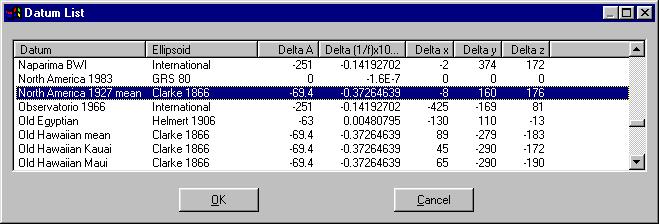
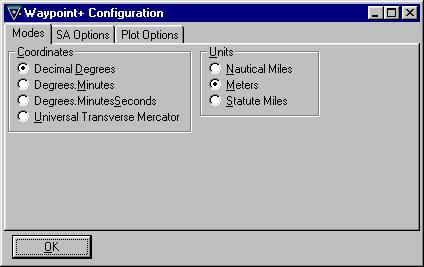
 You have to make a few changes to options in the file menu
3. Make sure that you have an Arcview project with a View made into
which you can put the data. This view needs to be projected via the
View
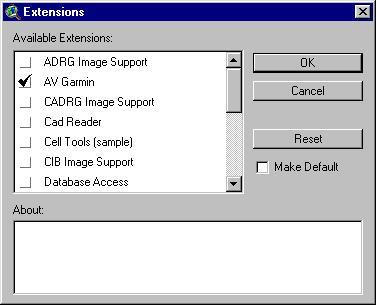
Properties box. Load the AVGarmin Extension (under the file menu).
NOTE: you can unload the extension once you have entered the data,
and in fact, it is dangerous to have too many home grown extensions loaded...makes
Arcview unstable in my opinion.
You have to make a few changes to options in the file menu
3. Make sure that you have an Arcview project with a View made into
which you can put the data. This view needs to be projected via the
View
Properties box. Load the AVGarmin Extension (under the file menu).
NOTE: you can unload the extension once you have entered the data,
and in fact, it is dangerous to have too many home grown extensions loaded...makes
Arcview unstable in my opinion.
 which
adds a button to your menu
which
adds a button to your menu 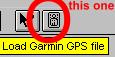
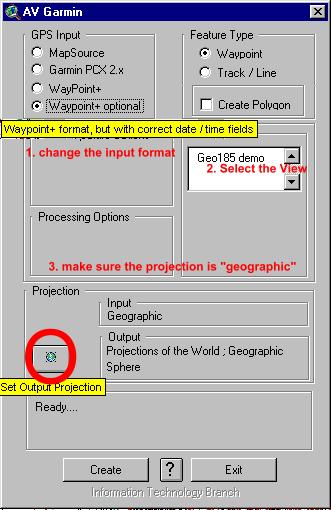
4. Use AVGarmin to add in the data to your view. Click
your new button and make the following changes.
|
-
Change the input file format to "Waypoint+ optional" format
-
Select the View
-
If it isn't set to "Projections of the World; Geographic sphere" change
it to that ouput projection by clicking the worldly button.

(It MUST be this type of data if it will be projected in Arcview
-
Hit "create"
-
You'll be asked for a name for your theme.
|
Next tune
Rectifying ("georeferencing") an image to
a coordinate system.
Steps in this process
-
get or scan an air photo or satellite image (e.g.,
www.terraserver.com) and import it into arcview (load the JPG extension
via the file if it is a JPEG image)
-
change the image to a grid (must have "Spatial Analyst" extension loaded)
-
create a file of points that match on the photo and
on the map
-
"Warp" the image so that it has geographic coordinates.
-
Reformat the grid(s) to image format if it is not
B&W
Acquiring the image
-
get any type of aerial image in most any image format (TIFF, JPEG, etc)
Color images will be a bit more complicated than black and white
-
create a new view with "raw" (unprojected) coordinates. This will
be a grid of cells. Make sure you have a map open in a different
view that has already been projected.
-
From the image view, under the theme menu, choose "Save as grid"
If it is a color image, you'll have to save it as 3 superimposed images,
one for each color red, blue and green.
Setting up the rectification
-
load the "Spatial Tools Extension via the file menu, which will add the
Transformation
menu
-
under that menu, choose the "from view" (the image) and the "To View" (the
map) ("warping from this space to that)
-
create a link table that will contain a pair coordinates from each view
for comparable points on each view.
-
set the link table to the one you just create.
-
Go to the "from" view and click on the "S" button in the bottom row.
Then zoom in (right click and hold, or using the zoom button) to a place
that you're sure you can find on the map.
-
click the image, and then you'll be shifted to the "to" view, where you
choose the same point.
-
You'll need about 10 points to do this well. Make sure that the cover
the entire area you want to "warp" and that the are spaced around the image
(not clustered in bunches). Be as precise as possible.
Warp the image
-
Once you've got the ten or so points, select the grids that you want to
warp and choose "warp" from the Transformation menu.
-
you'll probably not need more than 2nd order and you should choose "nearest
neighbor" so that no "averaging" takes place, just shifting.
Recreate the image (if not just b&w)
-
check out how well the image aligns with the map view once the warping
is complete.
-
if you're satisfied, change it back to an image (you don't need to for
B&W, just set the legend to 256 levels of black (1) to white (256)
) using the options at the bottom of the Transformation menu
Your assignment.
-
Make a new polyline theme that you digitize from the screen image of the
Lexington topo map that is a track starting at the science building and
meanders around campus, including some part near the atheletic fields.
-
Using the GPS, take that route on foot or bike and store lots of waypoints.
-
Download those data into your Arcview project
-
Rectify the color image of campus found on the L-drive (campus.jpg)
-
Plot your waypoints on the rectified image along with the track from 1.
-
Put that map, plus a copy of the table from the waypoints theme, onto your
web page.
David Harbor
October 12, 2000